23 magnificent DIY decorations that go Wow your family
'Tis the season ... to become clever!
You do not need to break the bank if you want to transform your house in it that you have always dreamed winter inducing the wonders of. In fact, with these incredibly easy and cost-effective DIY tips below, you will find that you not only impress your spouse and children (and regulations!), But you will also be the star on your instagram attraction block. So read the following, and spend all the money saved on gifts for those you like! And remember: but you decide by bridge your rooms,This is the date you need to take your Christmas decorations.
1 Ice Lanterns
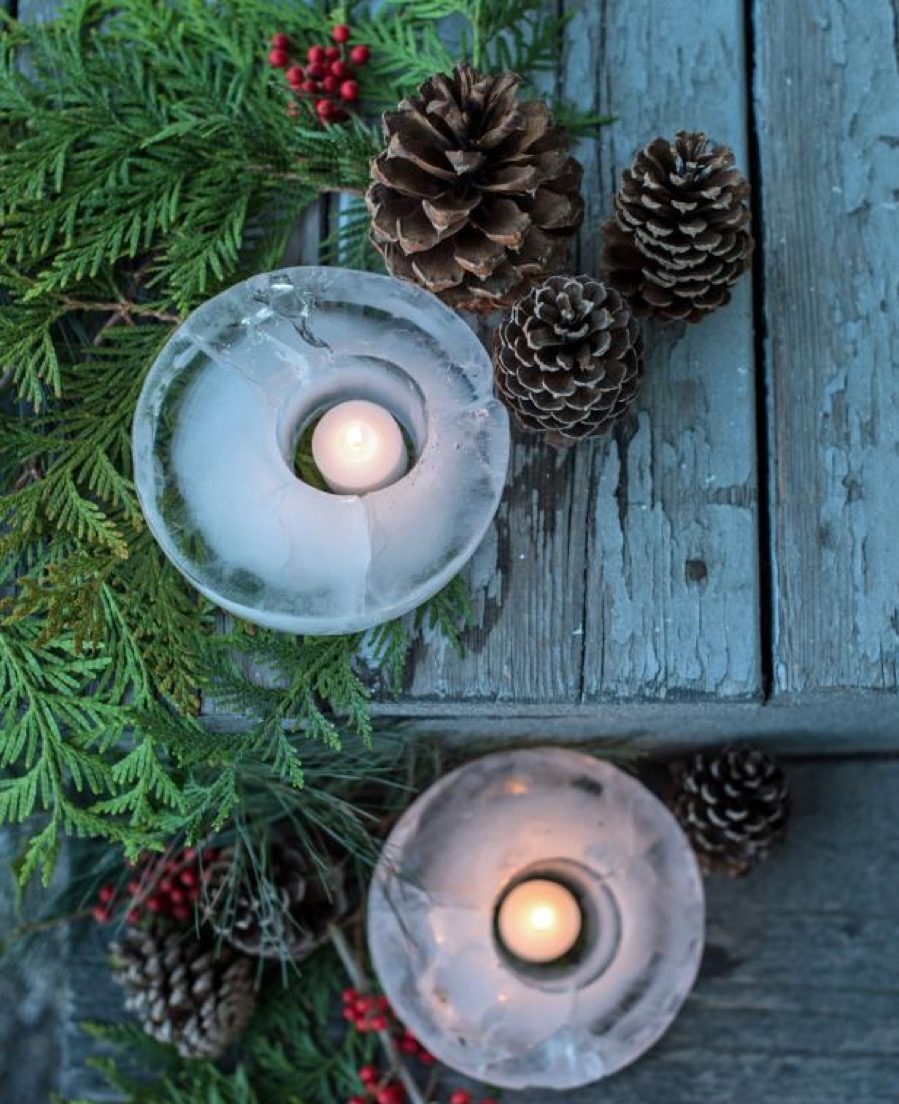
For decorators looking for an easy and cheap alternative for outdoor Christmas decorations, look no further than theseDIY Ice Lanterns. For these small ice sculptures, simply fill a large plastic container support with water, then plunge a plastic cup in the middle of the container to create the space for tea light. After leaving in your freezer during the night (or outside, if the temperatures are cold enough), take out the frozen mold to discover a perfectly fit ice lantern.
As long as temperatures allow out of the existence of these lanterns, you can place them on your porch or along the stairs leading to your entrance door for really amazing customers this holiday season. To complete the look, affix tea lights in the center of the lantern, and add keys of persistent leaf branches and pine apples for a truly masterful outdoor centerpiece. And for more means to avoid turning your home into a series of unfortunate decoration errors, see these20 common decoration tips You should always ignore.
2 Brilliant and bright crown
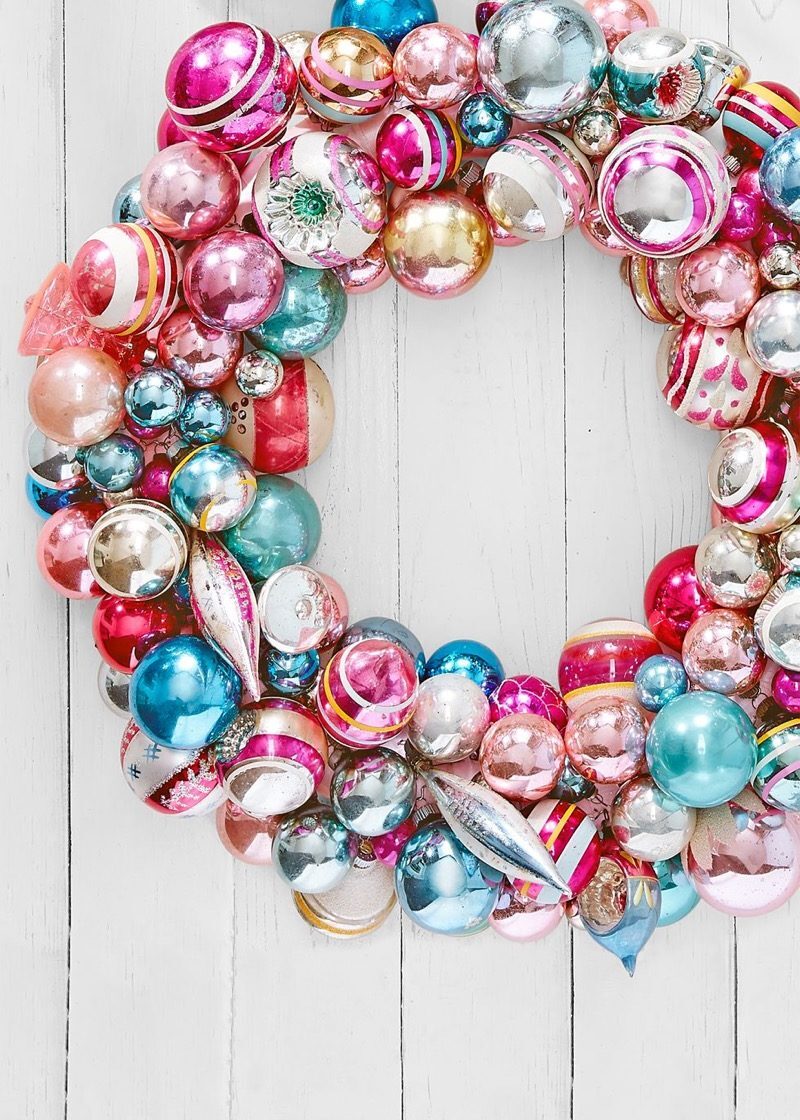
If your collection of ornaments is really out of the hand, take the brightest and the brightest on the rejected lot to makeCrown repurposed. As a basis, use a simpleStyrofoam crown wrapped in a ribbon. Then, using green pins (stick with the theme of Christmas!), Attach your unused ornaments favorite to the crown until you fully covered the base. If you end up doing more than one, use them to add a decorative key to your veranda or fence stakes.
3 Goutering Gouillon Trees
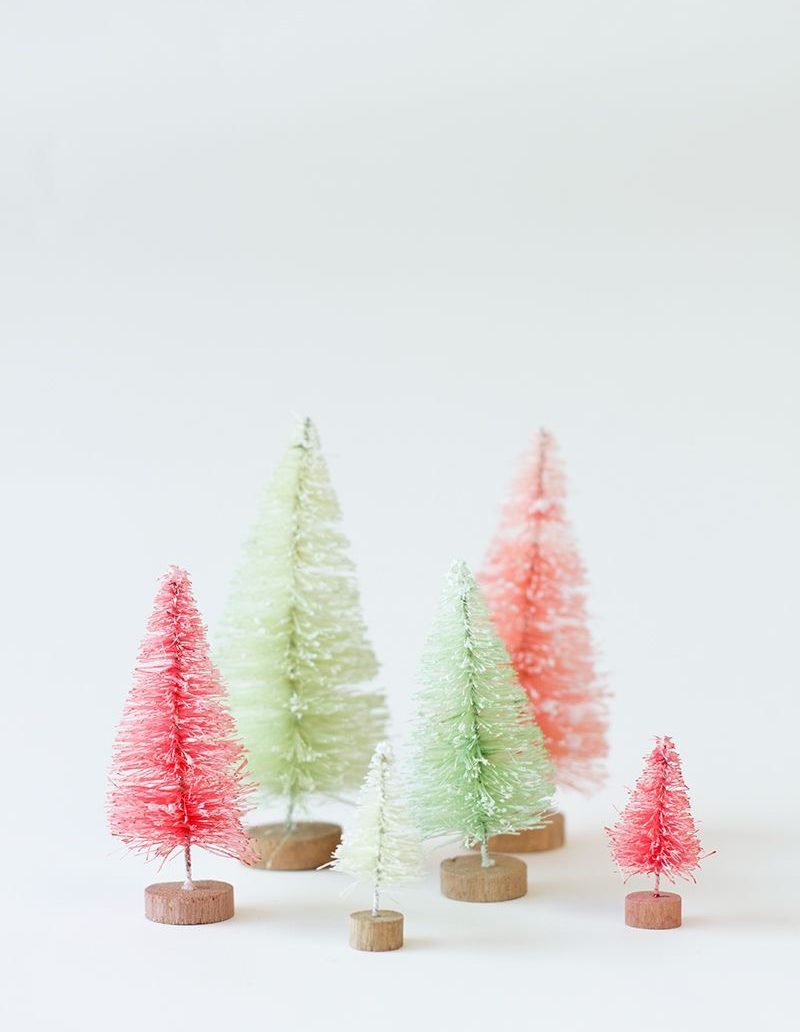
If your cloak is sorely lacking in the holiday decoration department, fill the extra spaces with joy by theseGouvillon gold tempered trees. To make these miniature trees, the food color use to dyeTrees White Pin any color you want. After the trees have dried well, use golden nail polish to paint the ends of the trees to give them the "gold soaked" look. To complete this gold-inspired decoration holiday theme, add gold confetti to the surrounding area on your cloak. And for more ways to save on the decoration of the house every day of the year, consult these23 Incredible interior decoration items You would not believe are Walmart.
4 Gift packaging service plates
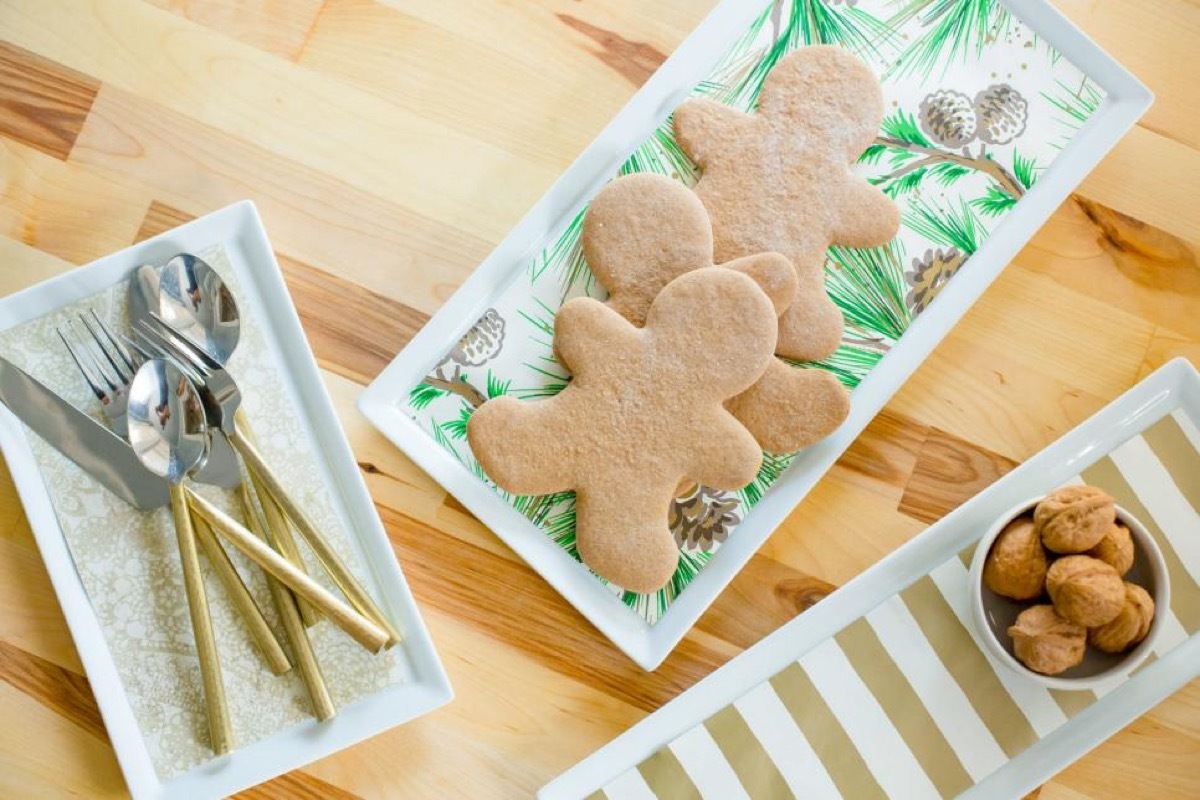
To cover all your bases, why not make every dish of service in shape in the holiday decor? To complete this celebration look, just enter a few different roles of packing paper and measure the length needed to align each service tray. More than anything, it is an incredibly easy and cost-effective way to make sure all your party accessories are up to.
5 gingerbread village
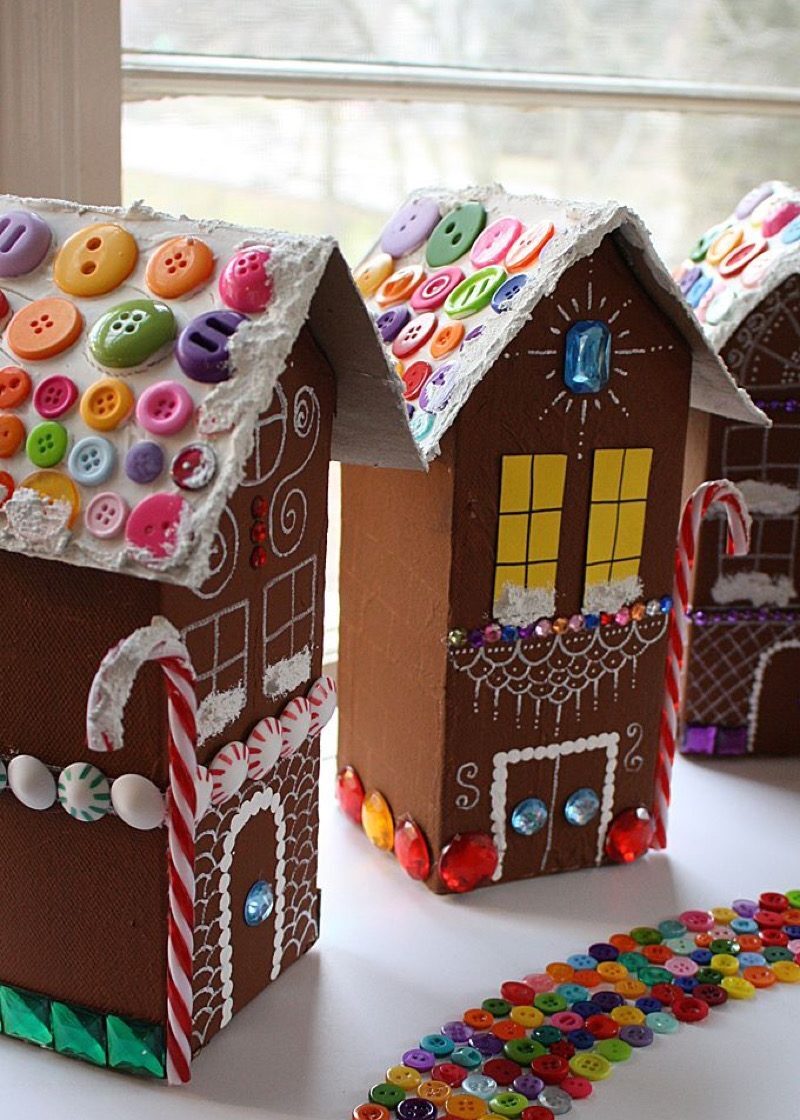
Instead of spending a fortune on culinary materials for a gingerbread village, why not create one from recycled milk cartons, towels, cereal boxes, and old buttons? The elements you might need to buy are: Cragry brown and white acrylic, snowtex paint, a white paint pen, fake candy canes, pearls, middle cutting and card stock-all yellow you can easily Find in your local craft store.
To begin, open the cartons on the side "for" and cut the top corner triangles from the cardboard, leaving a bit border around the "slope" triangle. Hot-glue these sides to create the front roof of your gingerbread houses. After that, the painting of a thin layer of cutting and towels on the cartons. Once this layer is dry, add another and finally, afterthis Dried layer, paint each of the light brown houses.
Then, using cardboard of old cereal boxes, cuts and shapes to form the roofs, which you will have the white paint and glue on the roofs. Once you have completed the main tasks, you can show creativity. Start by incorporating craft materials that you can have at your fingertips. (Easy additive:. Buttons you surely have a hidden million around) and if you need another reason to put your decorations as soon as possible,Science says that putting your holiday decorations earlier will make you happy.
6 Fake roaring fireplace
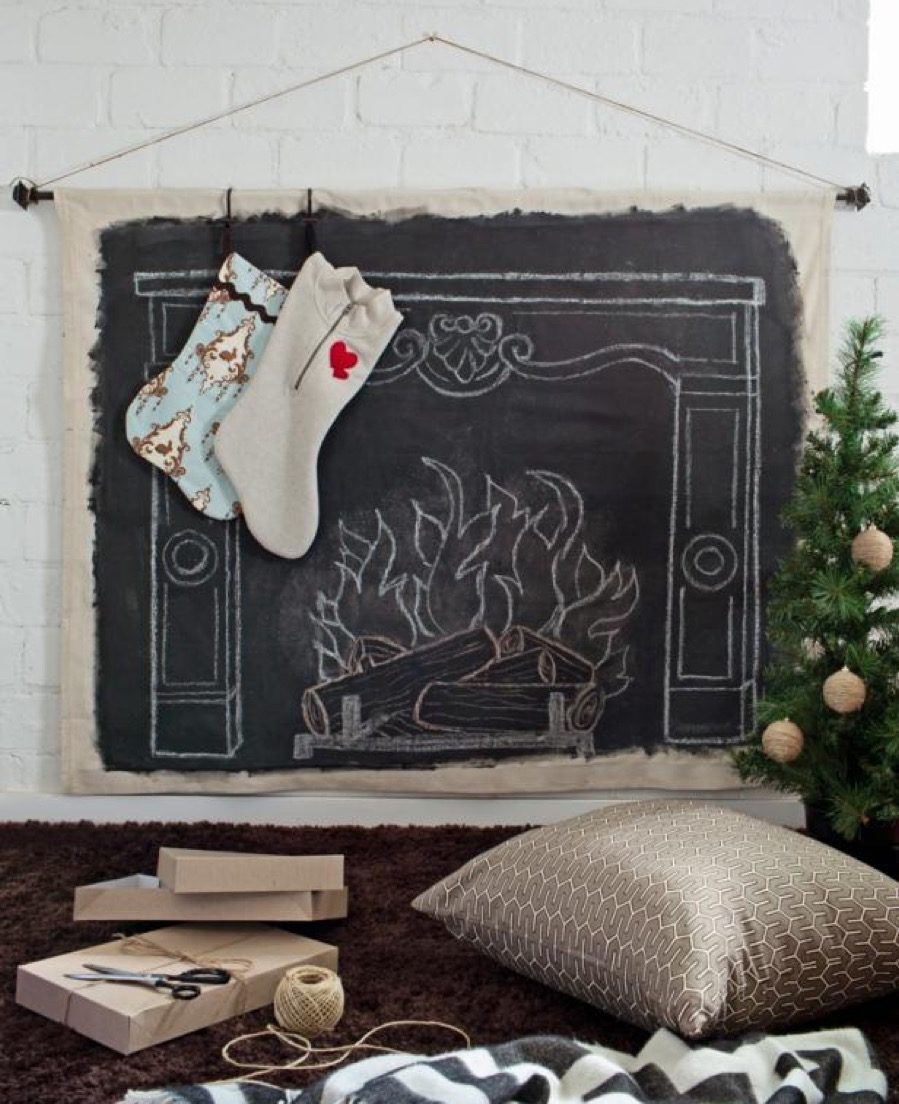
Even if your home is missing this flower roaring quintessential, you can nowcreate your own Cozy Wintetime escape the use of a fabric canvas, chalk painting and chalk to draw your own fireplace on a wall. To do this, simply prepare the canvas using chalk painting, allowing you to create this scene with chalk. Then, just drive a nail in the wall of your choice and hang the drapery with a curtain rod and a string and ta-da! Your WINTER WONDERLAND is now over.
7 Wooden banner

If you are looking for a rustic call, thisDIY wooden banner Can instantly bring a feeling of vintage and Woodsy in your home. Recreate this look using five pieces of round wood, about two to three inches in diameter, which can be easily found in any craftsman - or even outside your newspaper stack! After using a 1/8 "drill to pierce holes in the top of the wood to make room for the colored string of the baker, use stencil paper and red and green permanent markers to engrave your favorite holidays on the pieces of wood. Once you have assembled this festive garland, hang it in an area of your home in need of a small decoration, like a banner or door.
8 Advent calendar at mittens

Give the typical calendar of the Advent a more personal touch by reducing old sweaters to create theseminiature mittens Integrated with the days of December before until Christmas day. To make these mittens, first use pieces of paper to draw the circumference of each mitten and its day of accompaniment of the month. From there, use a tapestry needle and a colored wire to sew the numbers on mittens. In this process, make sure each mitten has two sides, so as to create pockets for small pieces of candies and trinkets. Finally, play proudly your creations by pinning them on a large picture frame or table.
9 Sparkling votes
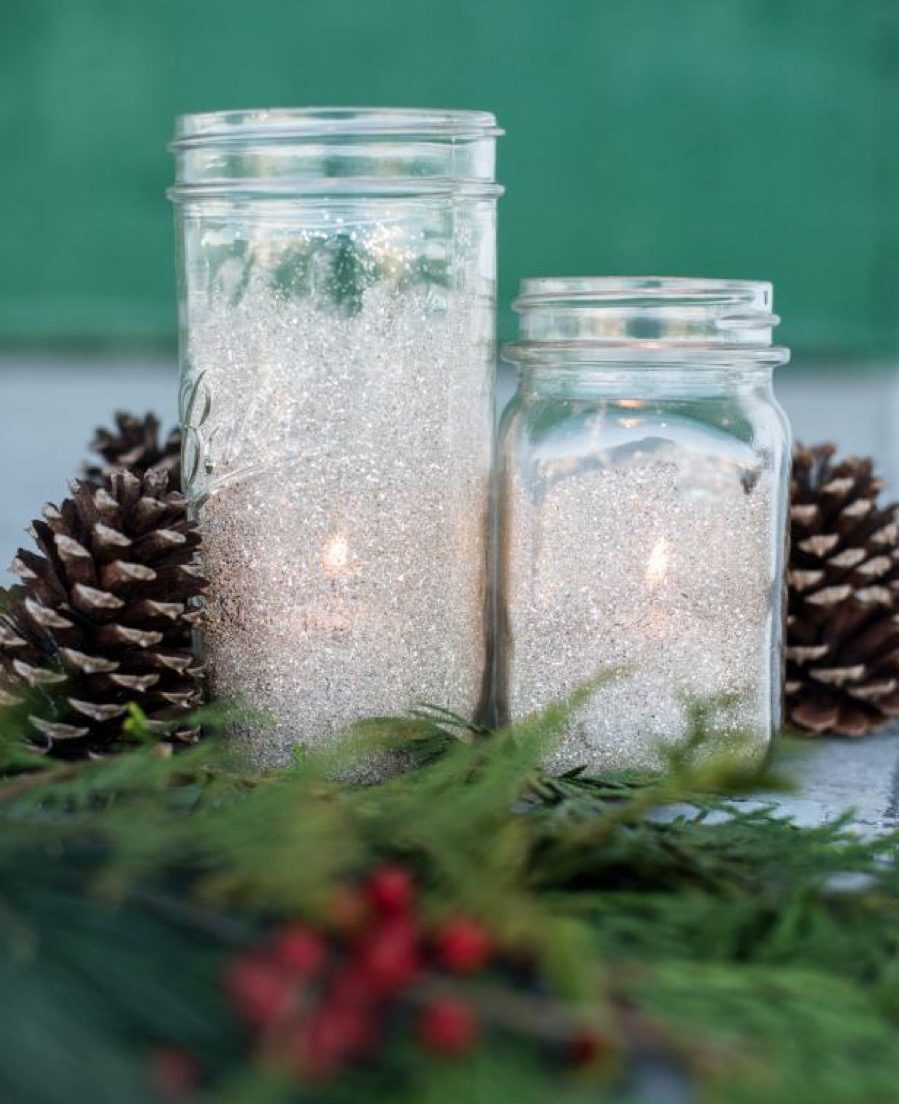
If you are looking for a way to decorate your home for aholiday party, thosesparkling votes Could you simply deceive your guests believe that you dropped a little money from your checkout and your local barrel. Assemble in this atmosphere by applying glue inside a mason pot, then using a spoon to distutorially distribute the glitter. When you are ready, place third parties or small candles inside the pot to create the sparkling effect.
10 Christmas tree-packing paper
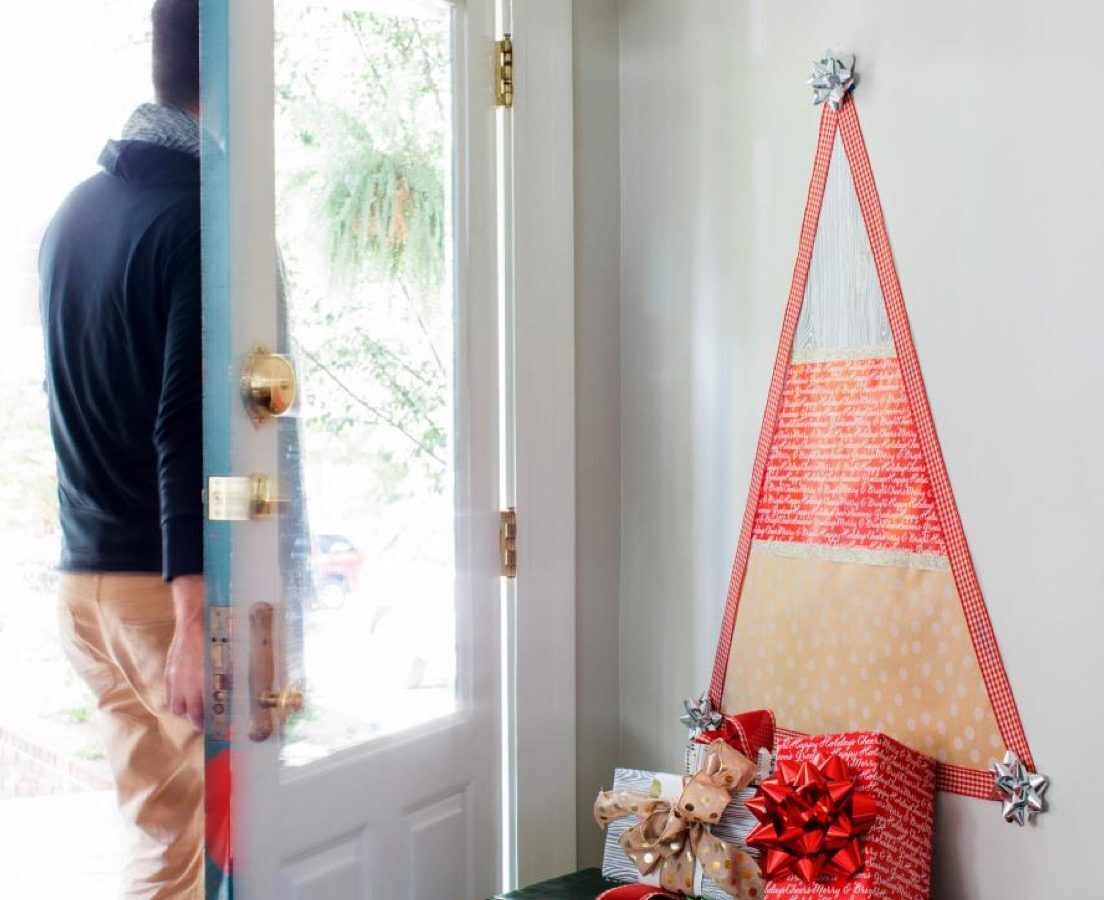
If there is one thing that always seems to be wasting each holiday season, these are the endless rolls of Wrapper paper. Make a weakly enlightened entry more inviting by putting all this unused paper to create a totally unique Christmas tree. After following three models of different packing paper, stack them on the other using double-sided tape and ribbon to give the polished edges of the tree. Then simply add arches to each corner (and some gifts under the tree!) To give it full effect.
11 Snowman of the Crown with Persistent Leaves
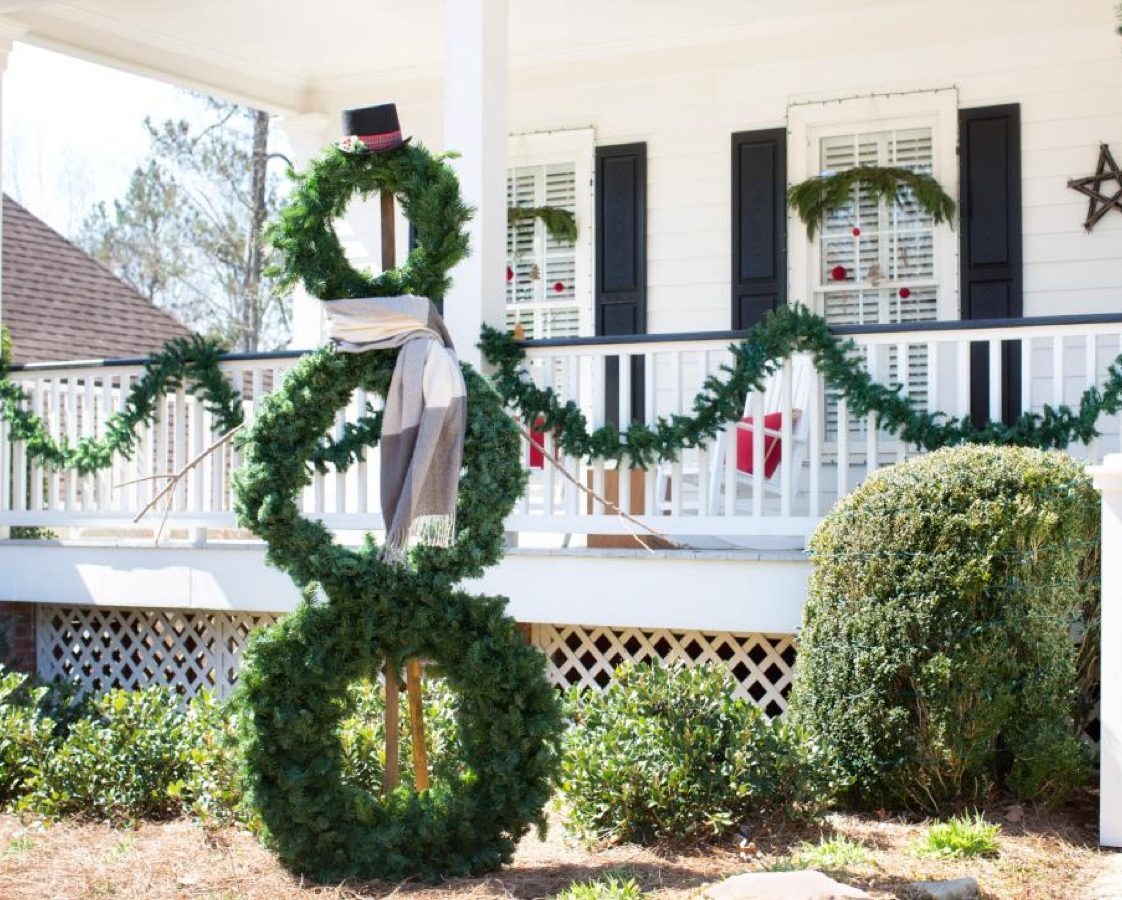
To create a decoration that will last many future holidays to come, take on a large wooden pole, about seven feet in length, in the floor. To make sure that the pole is robust enough to support the snowman with persistent leaves, create a wooden support beam and secure it into the pole with a nail. Then decide where the three crowns false Evergreen in a ascending height will be decided, use 1/2 "outdoor wood screws and a galvanized wire wrapped around the wooden pole to fix the crowns in place. And finally. Add the holiday touches you are needed to complete the snowman - like a high-rise hat and a scarf.
12 Felt skirt
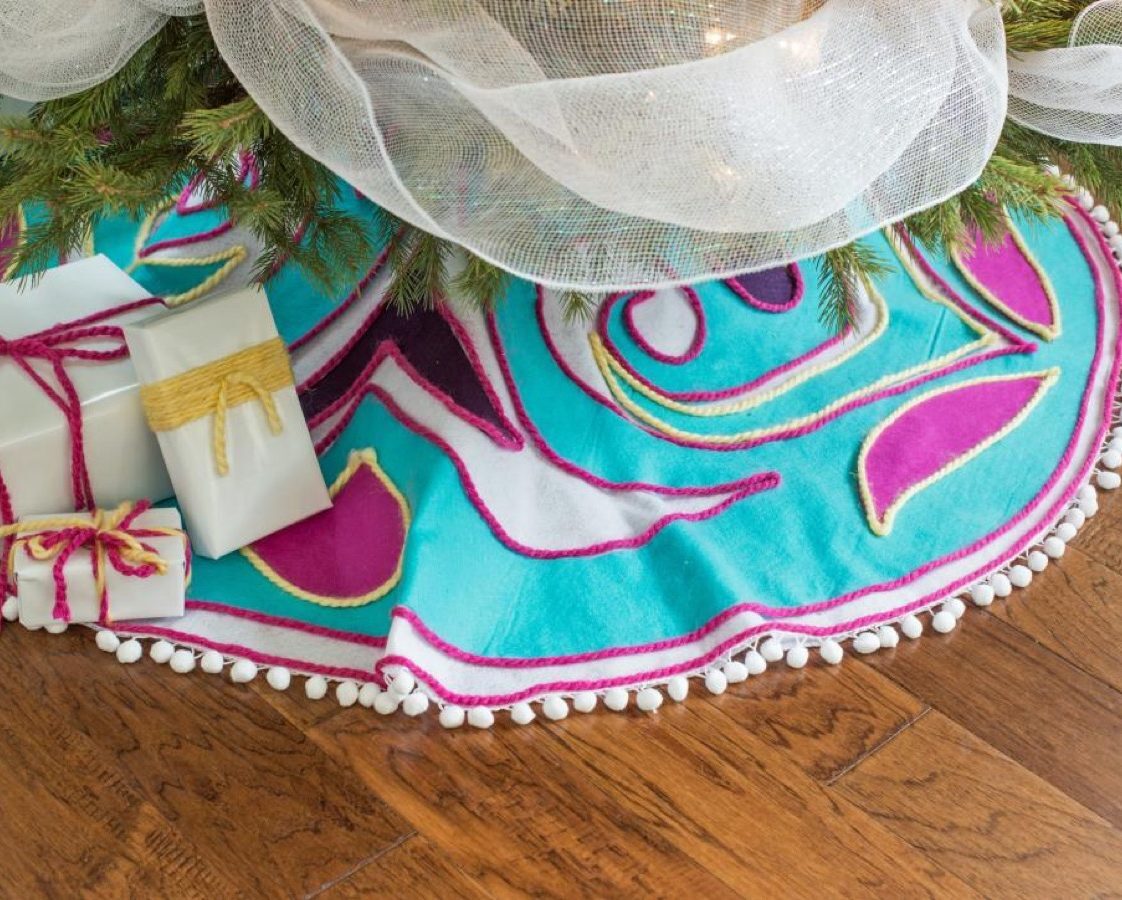
Rather than using this dusty heriting tree skirt, test your creative skills by creating thisColorful felt tree skirt, which requires zero sewing. Start by gathering about a year and a half meters of white, turquoise and two to three complementary colors of felt material. After cutting a square of 48 "out of the white fabric fabric, bend the square in half twice, tie a piece of string around a pencil to draw a circular shape needed to create the hole in which the tree would agree .
Then, using the white skirt as a matrix, cut the turquoise felt into a circle of 48 ", then bend this fabric in quarters. After the beginning, create an easy and easy design with chalk; draw it on the felt. Similar to a paper snowflake, the design cut will result in a symmetrical design, which you should then place on the white felt. Now, using chalk again, create more symmetrical patterns and layer the complementary colors on The white and turquoise felt on the white and turquoise felt. Once the design is complete, glue all the pieces together.
To add a decorative border like the one indicated above, apply a fabric glue on the outer edges of the skirt and pieces of felt. Then create cohesive boundaries with a thick thread in a complementary color of your choice. Finally, glue on any added embellishment (Pom Poms!) For an additional effect.
13 Wooden menorah
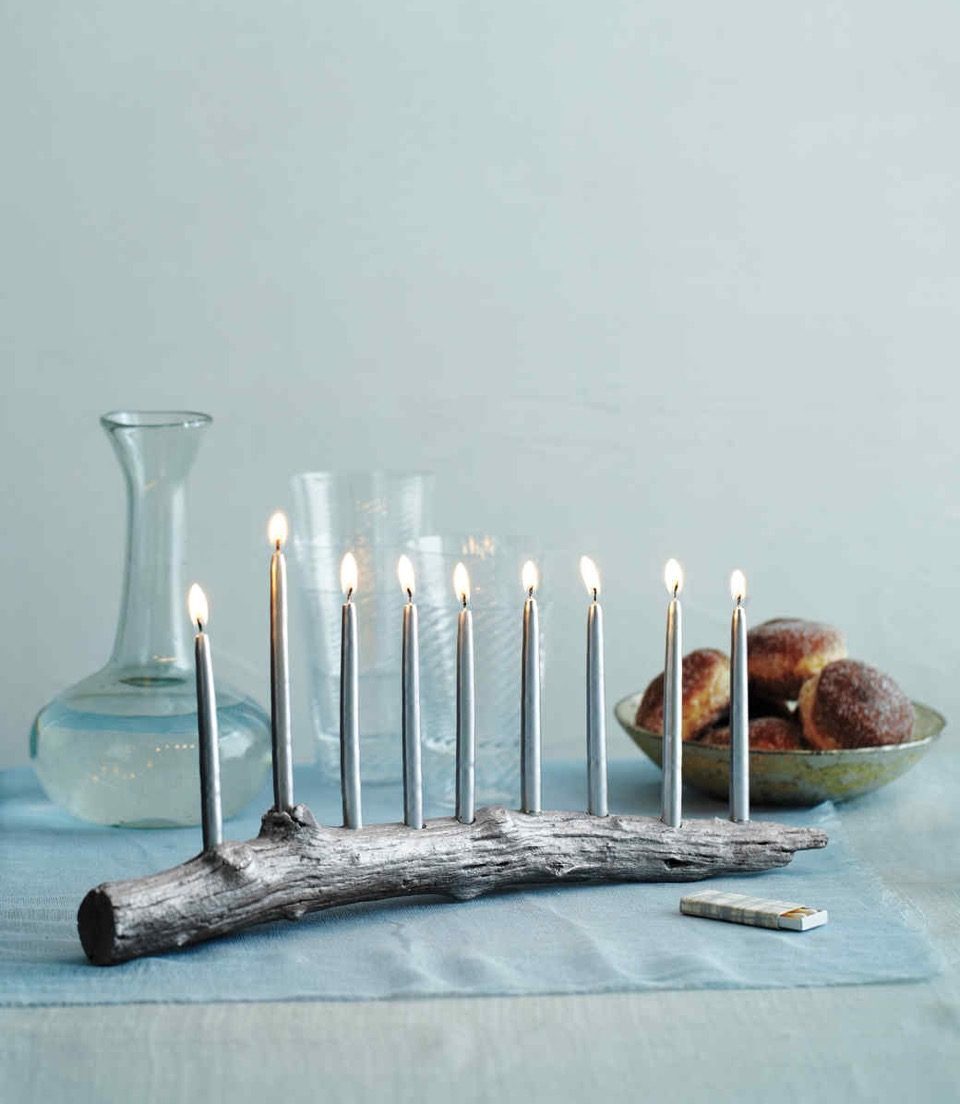
Celebrate Hanukkah in the most fashionable as possible by creating this Terrestrial Menorah. If your location allows, avoid being outside and find a branch, at least 16 inches long containing an elevated node (used to place the caresses, or the candle used to turn on the other candles). Once you have found the perfect branch, mark new space points uniformly spaced (including the raised node) with a pencil and drilling holes in the points with a 3/8 inch bit. Then, using silver craft paint, decorate the adequate branch to smooth the crude edges of the wood. After the paint is dry, applied the self-adhesive bumpers at the bottom of the branch to remain stable. And for more than eight crazy nights, here's15 reasons why Hanukka is the most underestimated festival of all time.
14 Bottles of snowflake wine
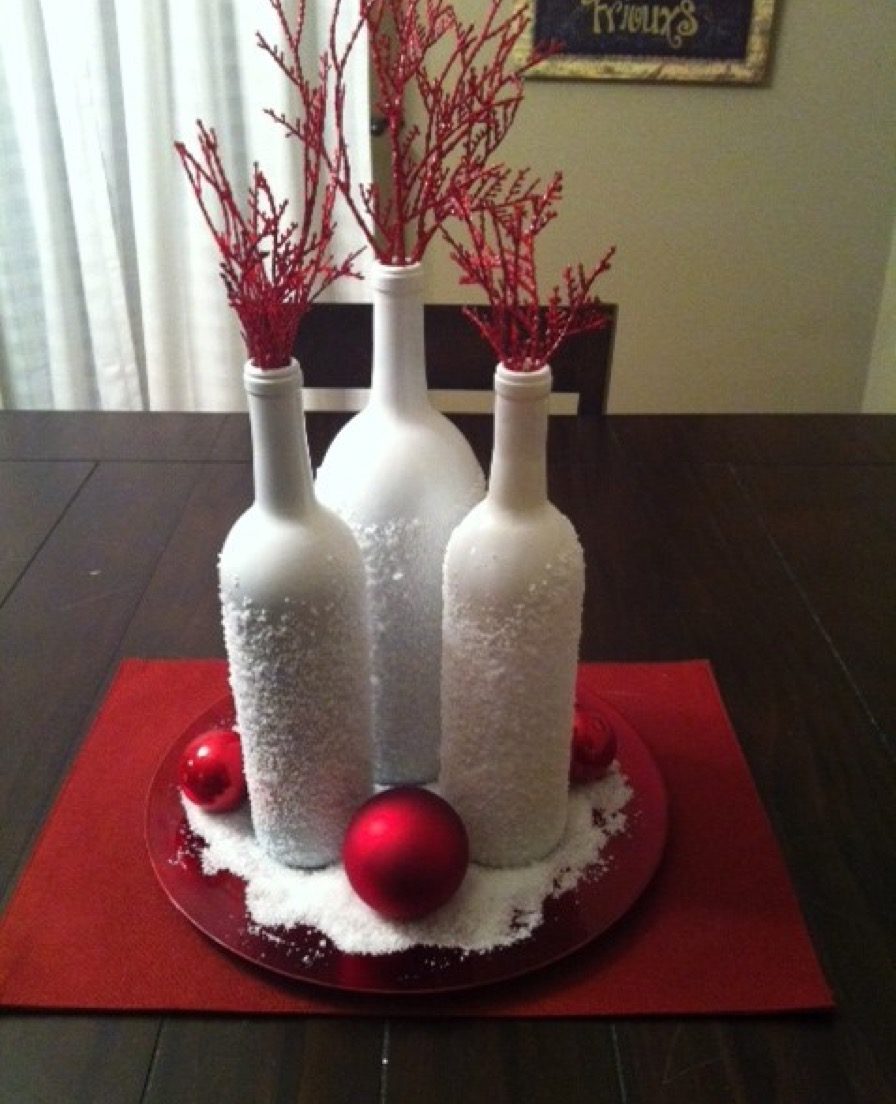
Put your old bottles of wine To use this holiday season by making them a centerpiece for your dining room table or coat. To recreate this look, simply remove the labels from the bottles of three varied wine bottles, then use the white paint, the glue and the false snow of any craft shop to decorate their exteriors. Place the three bottles of wine, as well as some red ornaments and a false snow, on a red or green decorative plate for really packing this holiday season.
15 Snowman fish bowl
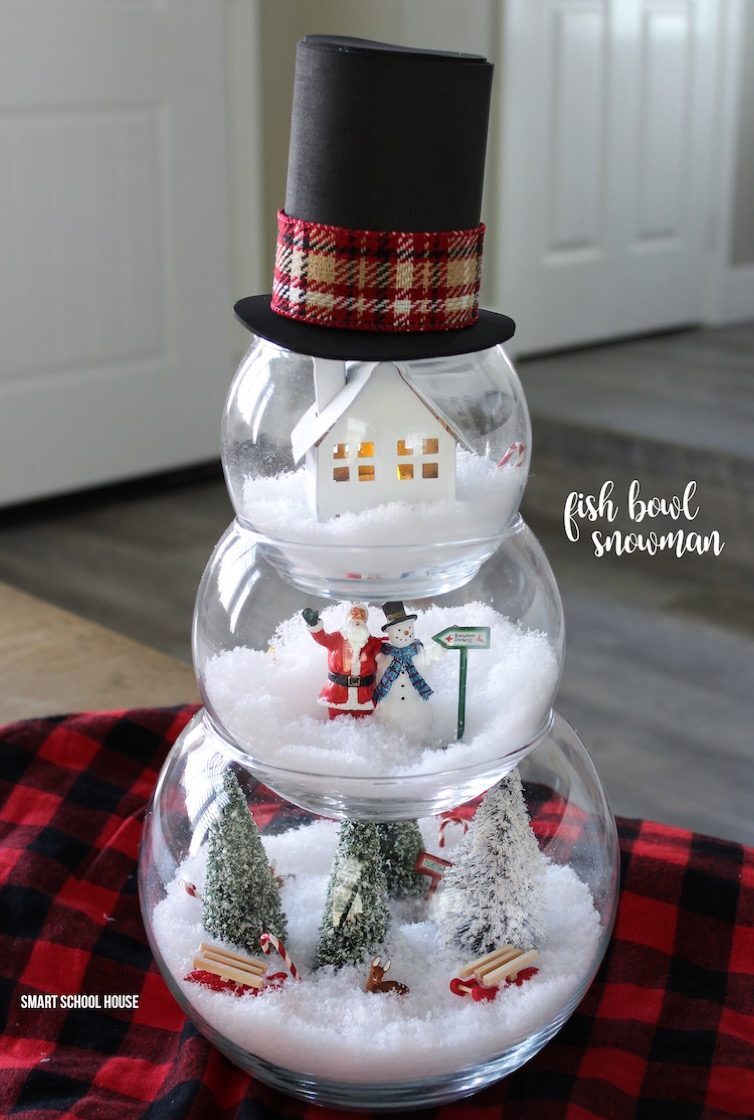
For those who tighten on time but loose on creativity, thatproject is perfect for you. After placing a small amount of false snow at the bottom of each fish bowl (which you can find about each craft shop), organize the different pieces of snow village (also available in most shops of Crafts) to create a special moment in every bowl. Then carefully stack fish bowls on another, adding glue to precarious points that may require it (although they stayed in place).
To create the hat on the snowman, trace a circle in a black foam fabric slightly larger than your smaller fish bowl, and to create the length in the hat, cut a rectangle from the fabric to roll in a cylinder. Then use a hot glue gun to attach the edges of the cap, then a ribbon to return it.
16 PAPER LIGHT GUIRLAND
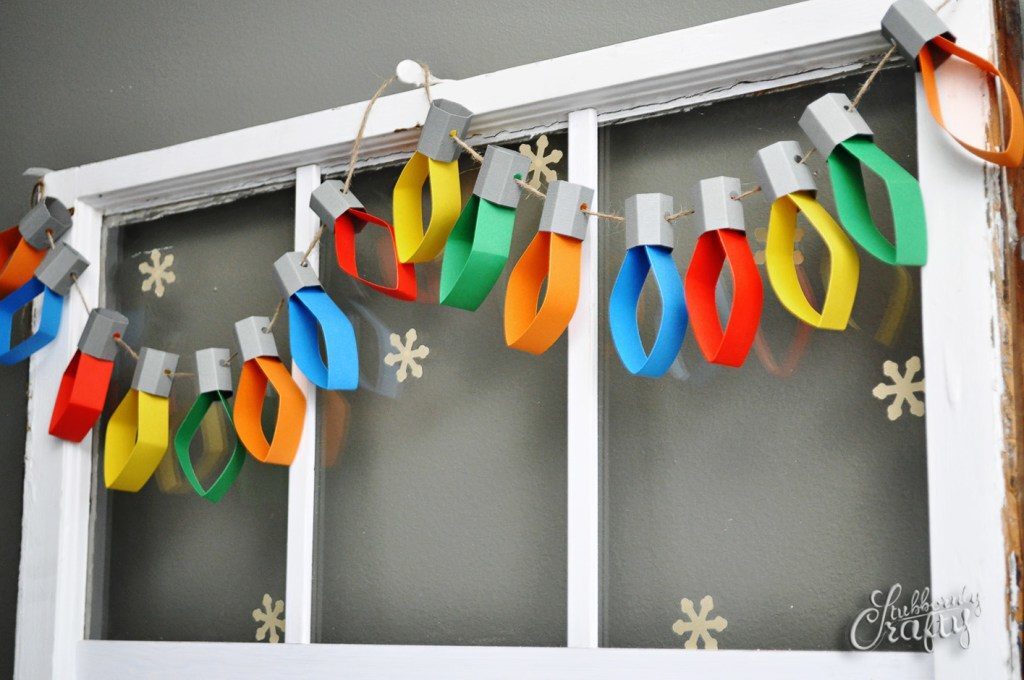
If you prefer not to work to unravel this chain of lights this holiday season, simply create your own version with a real rainbow of different color cards, a bouquet of gray card stock, A glue, a punch, a brand blade and string, ribbon or thread.
Depending on the number of traffic lights you want, use a rule to measure two groups of paper tapes: one to four inches of an inch (use the gray stock for that) and one with eight inches 3/4 inch. After ensuring that you have prepared an equal number of the set, take the gray bands of four inches and bend them twice. Since it will be the first pieces in which the string will be inserted, posing the completely flat band, cut a hole on the third left rectangle. This will provide a place for the string to go.
After having glued the ends together, go to the other set of tapes. I told them in two and hit a hole across the top, where the ends of the paper strip meet. Once you have assured that each paper strip looks like a light, insert them into other circular paper tapes and secure the string through the two sets of holes. If you are satisfied with the finished product, host your thread lights from any chimney, wardrobe or door of the door in need of a colored decoration.
17 Gift of stacked gifts
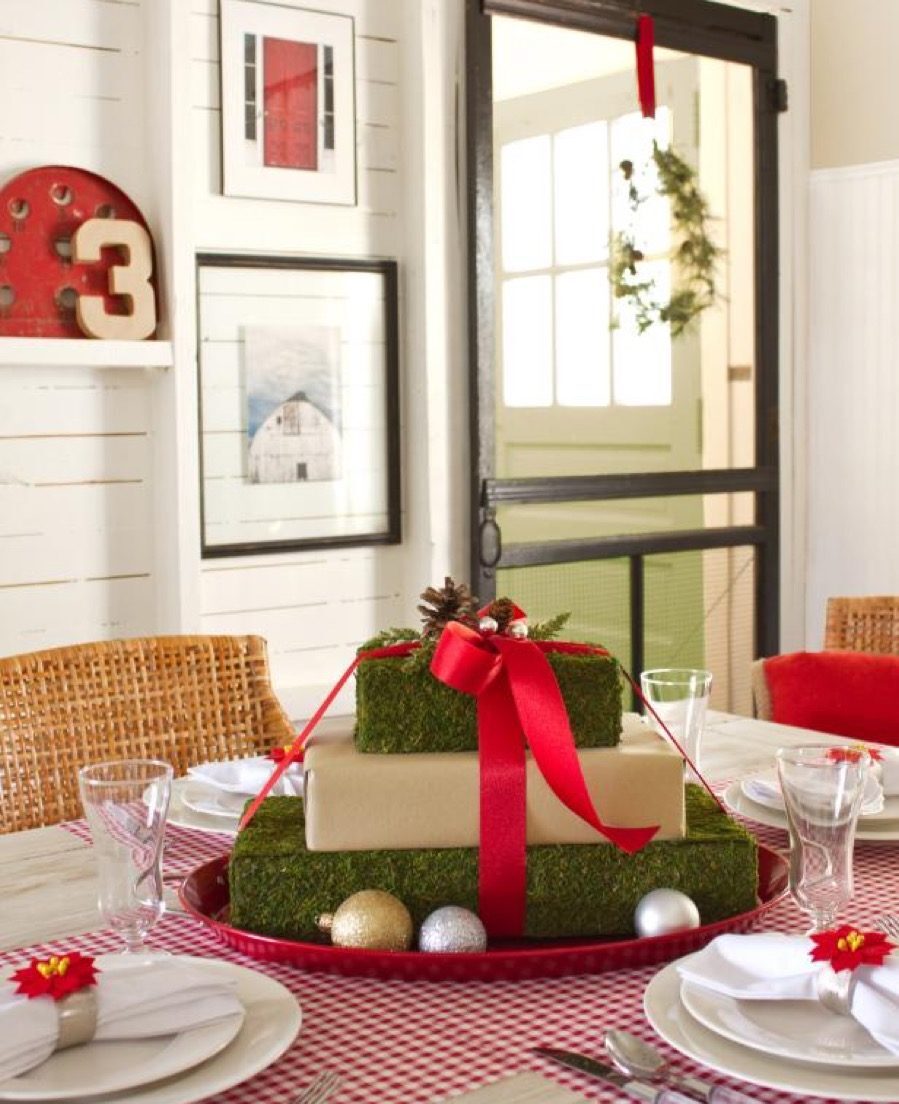
If your holiday table missed that the magic centerpiece to ring to joy, book a few minutes to create this simple and terraced centerpiece stacked. Simply wrap three foam bricks of various sizes inKraft paperAnd the leaf foam, stack on them and glue together. For the finishing key, wrap a red ribbon around the entire gift box, place it on a decorative service tray and ornner with everything you may have posed around additional ornaments and small Christmas decorations.
18 Personalized place cards
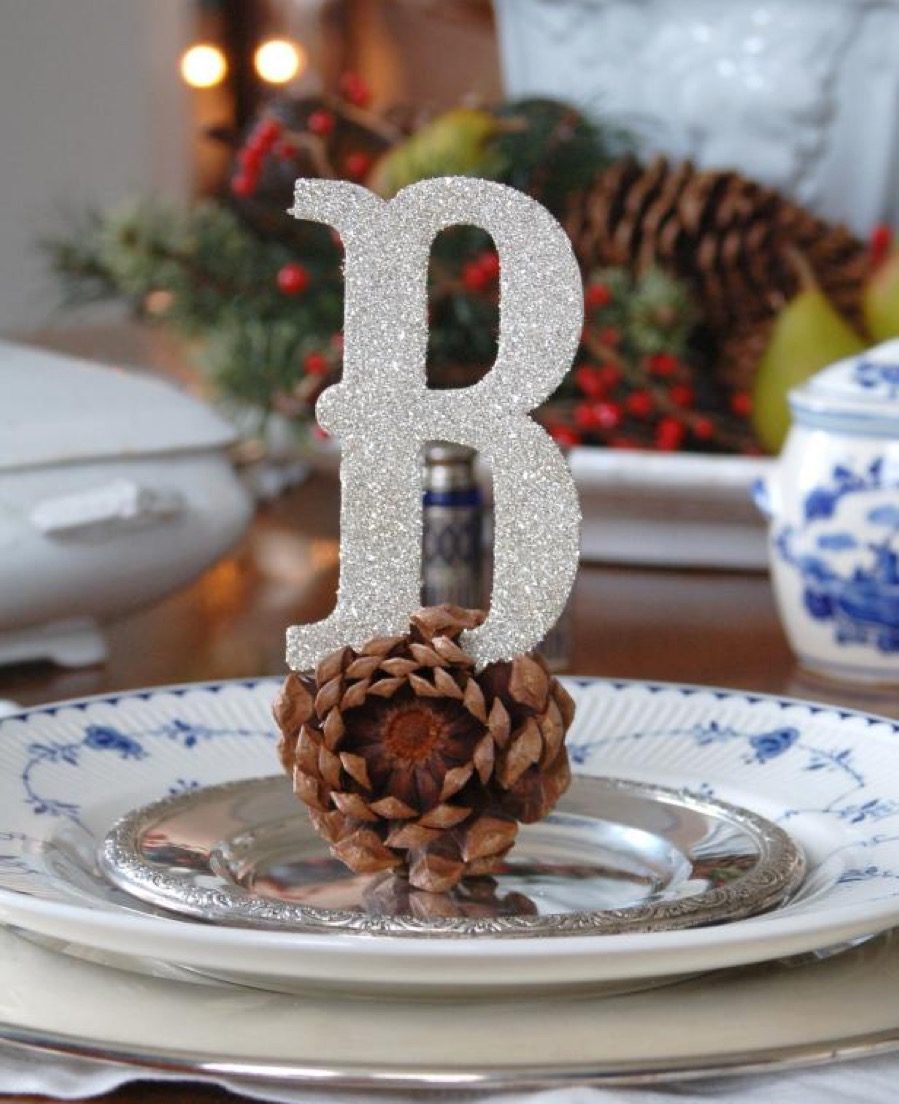
Instead of sticking with the same paper space cards (or even worse-having no place card at all), take a few minutes from your well-filled holiday schedule to create these fanciful place cards. You will need to catch a pinecone, an artist brush and a traditional letter of agglomerations (one for each of your guests, assuming you choose the first letter of their first name to identify them).
Then, simply use the artist brush to apply the normal elmer glue on both sides of each letter, then sprinkle glitter glue on both sides until they are completely covered. Finally, fence the letters in the Pineconones - and you now have really elegant square cards that escape your family and friends at the next vacation gathering.
19 Low sweater
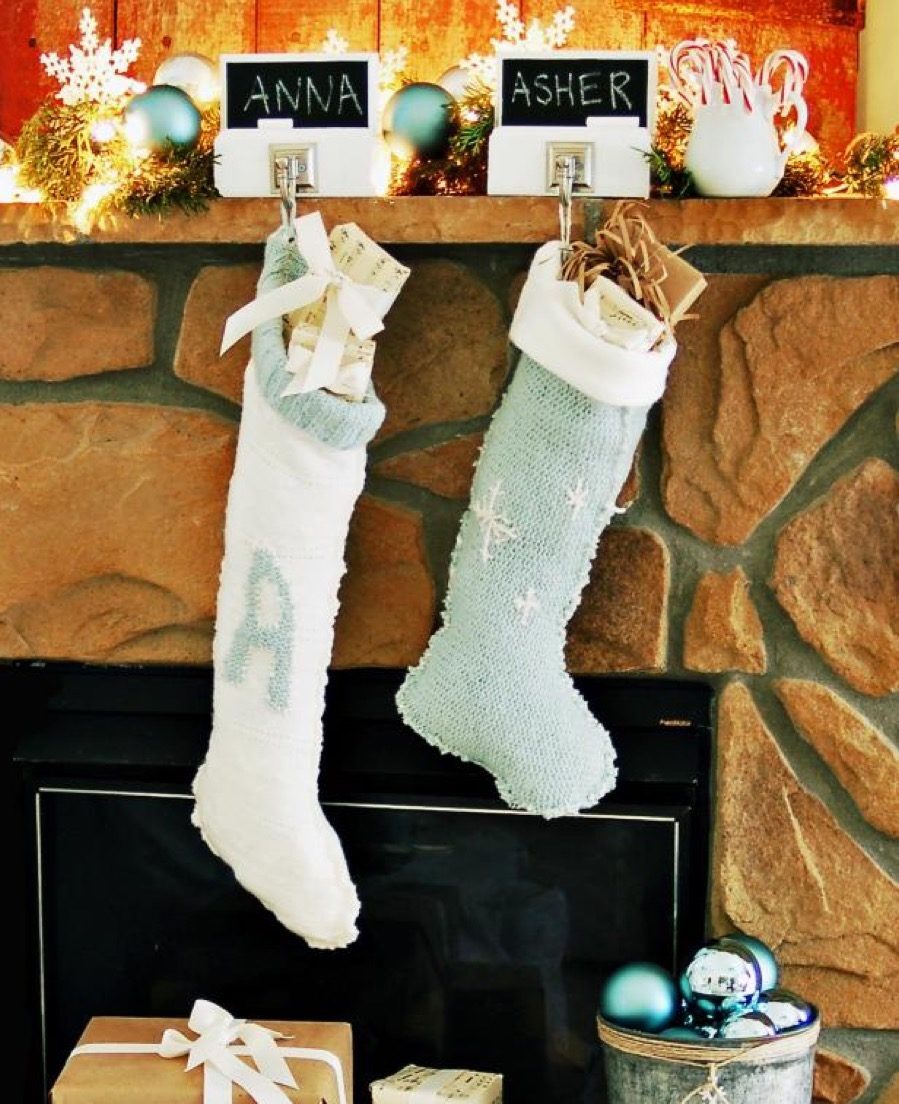
If you're tired of hanging up the same old year year after year, look at old sweaters on the back of your closet for design inspiration. Whatever the low number you will need to suspend by the chimney this year, the creation of new sweaters will only need an afternoon of crafts. (Remember in mind that this project requires the use of an old storage sweater, make sure you have enough hardware before embarking on this business.) Apart from the sweaters, you will have Need color blurred wire of your choice, a padding needle and sharp scissors.
Before creating down, print a template for storage you will then pin with each sweater. Then, using the scissors, cut both the front and back of the sweater along the lines of the storage template. After that, sew together the front and rear portions of the sweater to create the bottom, using the padding needle and the blurred wire. Depending on the embellishments you want to add to storage, you can follow it more.depth guide Determine how to create letters and snowflakes.
20 Shell
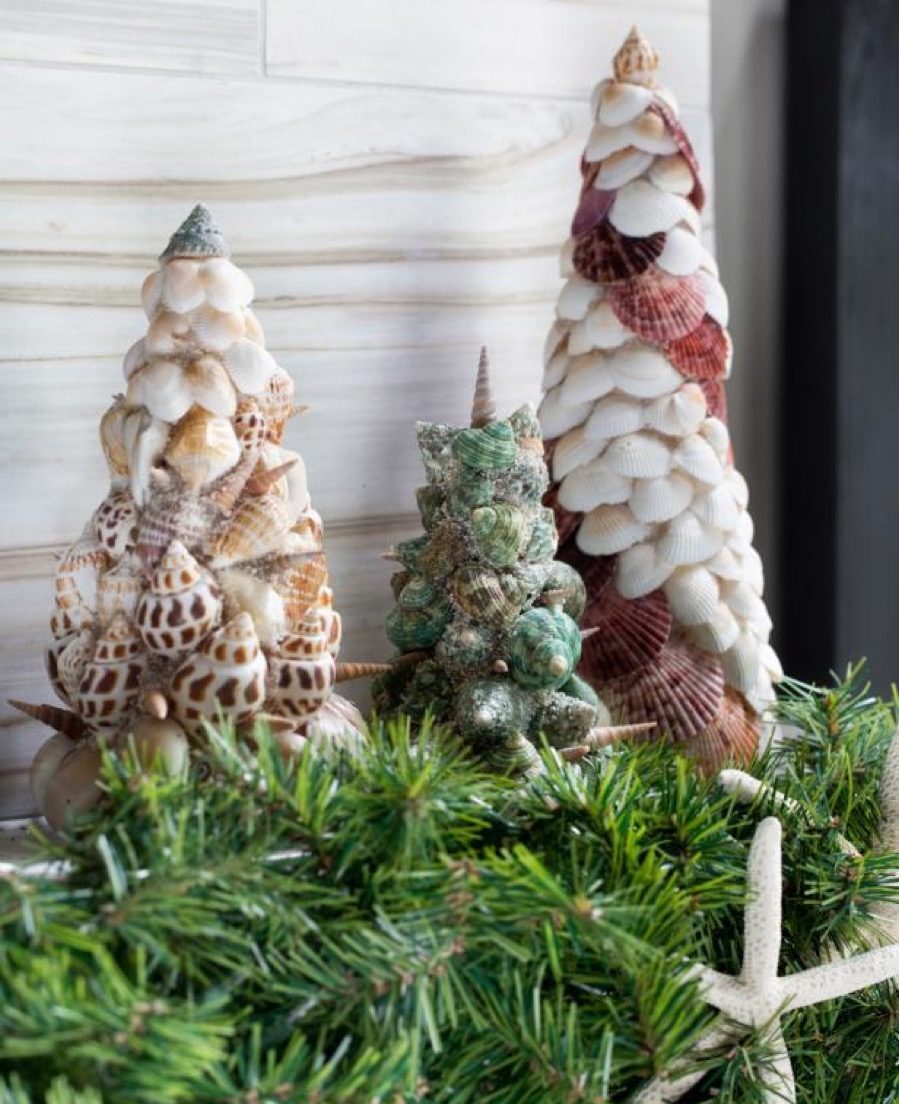
This Christmas tree inspired by the beach can offer an ideal way to inculcate the holiday spirit in Wintry in a warming climate. Start by using shells in your local craft store, rather than using captured shells in your latest beach business, you can prove more conducive because you can easily create the models shown in the example CI -above. In any case, be sure to enter shells in assorted sizes and colors to create the above models. Using asimple base Made of foam, start from below and open your path in the tree, collage shells based on the patterns of your choice. This project is a great company for those looking for a little more independence of DIY.
21 Advent calendar of the takeaway box

Finally, there is a goal forAll these boxes take away It never seems to make a way towards garbage, this calendar of the adorable box box adable! For this project, you will need 25 white takeaway boxes (so be sure to save to start saving them now), red and green construction paper, white number stickers and fighter cut paper filler.
First, use a rule to measure the bottom width of the box and the length of the box of the metal handle down. Then using these measurements, cut 12 squares of red and 13 square construction paper from green building paper. After placing these squares in the takeaway boxes, attach each of them with double-sided adhesive tape, then then use the white numbers stickers to a number of each box. Start with the red box and alternate between the two colors until you march the day 25 on a red box. Once you have added the last keys, the takeaway will offer a smart way to hide the gifts of your loved ones.
22 Retro inspired tree topper
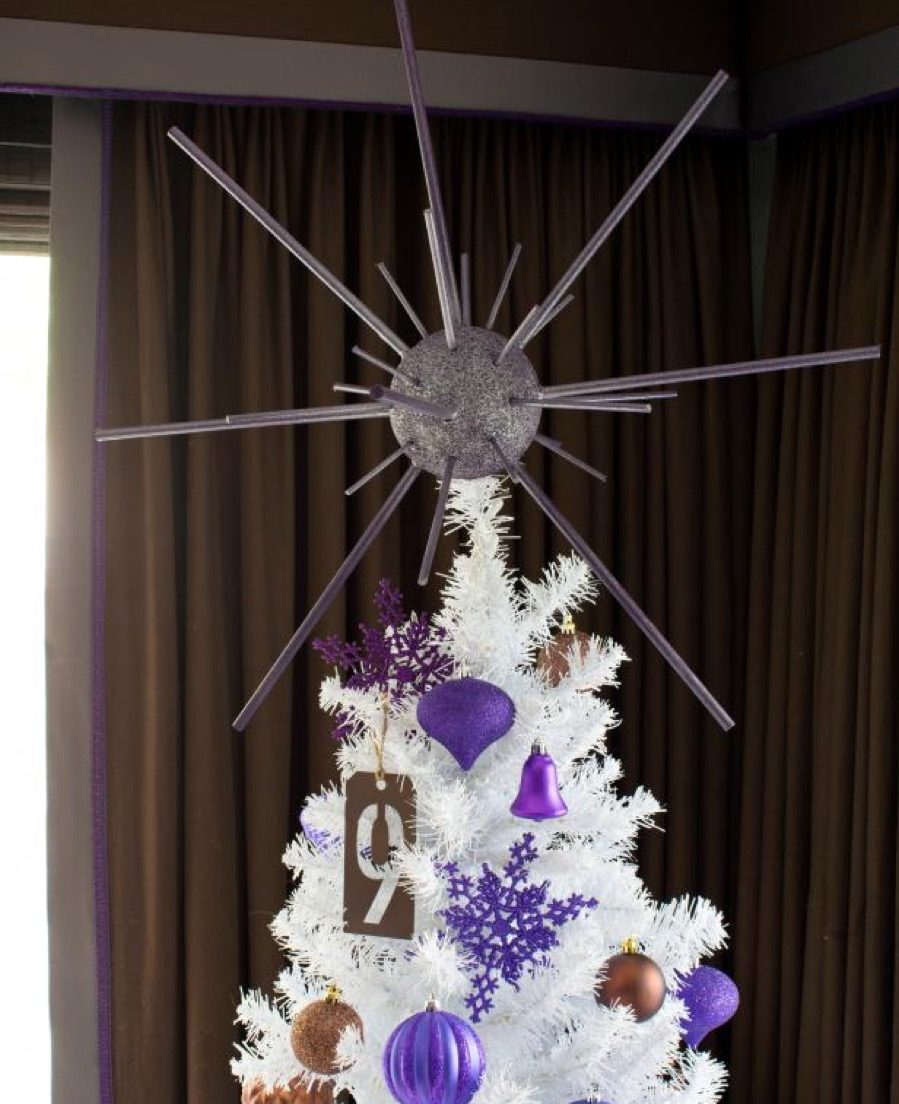
It's not a secret thatTrends from the 60s have returned in a great sense recently. So, if you are on board this focus on all the modern modern and spatial things, creating this retro inspired tree top can carry some of this style into your holiday decor. (However, be warned: it's a bit more intensive time, so be ready to spend a few hours creating this display cap.) To start, you will need the following:
- Floral sphere of 6 "foam
- 9 wooden studs of size 3/8 "
- 8 Dowels wooden 1/4 "
- 12 wood studs of size 3/16 "
- Small eyebrows with a tab
- Hot glue pistol and glue sticks
- pen or marker
- Kraft paper roll
- tape measure
- spray paint
- Spray painting of sequins
After rounding these objects, use your 12-inch 1/4 "1/4" 1/4 "3/4" 3/8 "thick stud in length and 3/16" Dowel Four inch pocket length. Then using hands by hand, place each wooden stud inside the tab box and cut them on the marked indicators. Then, after the spray paint of the ankles in Wood with the desired color, insert them into the sphere of the foam. Once this step is complete, spray the sphere of the foam of the same color, for an additional level of cohesion.
23 Pinecones packaged wire
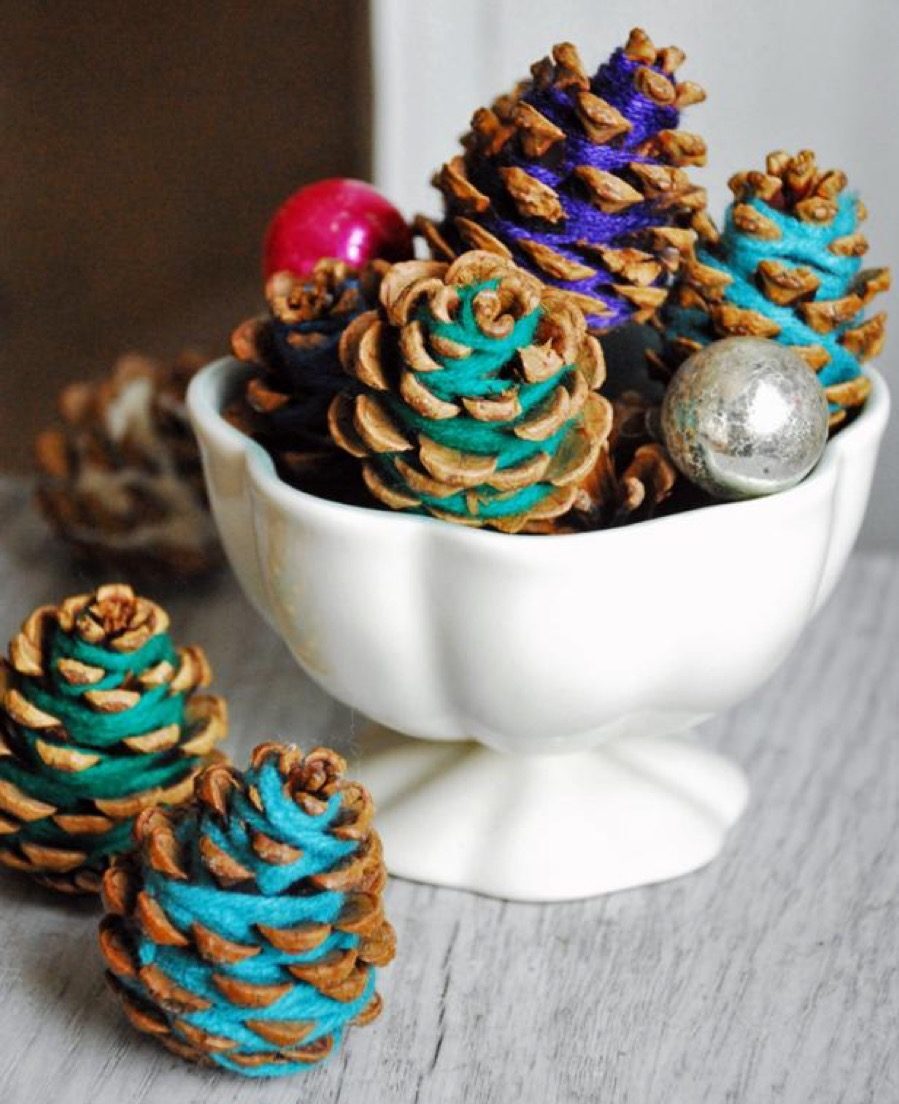
Using real pinecones (or those of a craft store if you do not really find in your garden), wrap pieces of colored wire around the outside, securing each end with a glue point. This project is perfect for last-minute decorators who want to add an extra touch of frightening to their holidays. To complete the atmosphere, place the pinecones in a bowl of decorative or simply place on a surface requiring a decor. And for more information on your favorite decorative trends (and maybe why they have never been supposed to be), checkThe worst decoration trend at home the year you were born.
To discover more incredible secrets about the life of your best life,Click here To follow you on Instagram!


Dr. Faisci has just made this frightening prediction on the U.K. Covid strain
