Elsa hair tutorials frozen for your little cutie
Halloween arrives and I am almost sure that the frozen Elsa costume will be among the most popular costumes for girls this year. So, do not hesitate and find the Elsa costume for your little cutie now! In the meantime, we will help you with the braid or brioche your ...
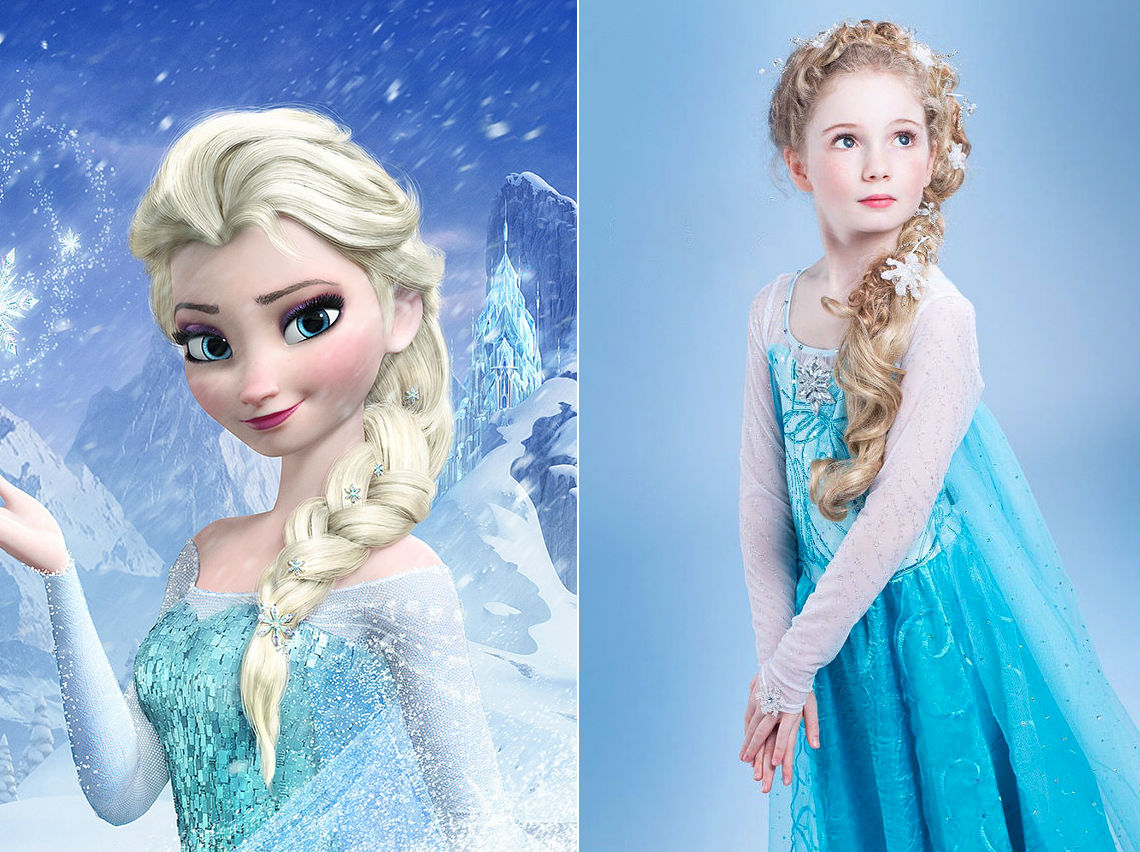
 Halloween arrives and I'm pretty sure ELSA costume will be among the most popular costumes for girls this year. So, do not hesitate and find Elsa's costume for your little cutie now! In the meantime, we will help you with the braid or bun your little Elsa may need for a perfect look for Halloween.
TUTORIAL OF THE TRESS OF ELSA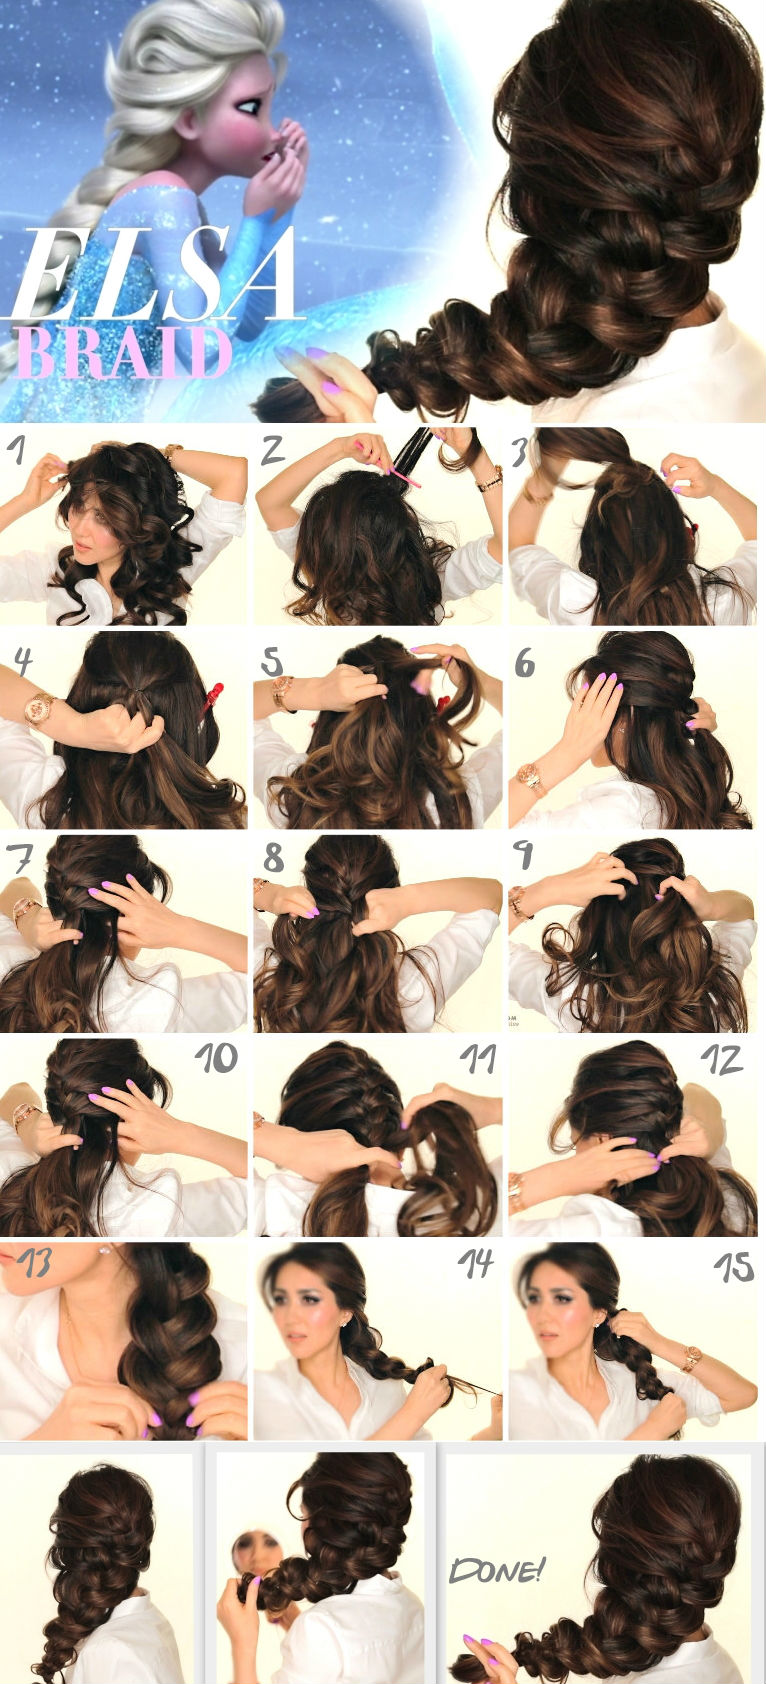 This hairstyle is super easy and beautiful, it is actually a beautiful French braid. To do this, you will need:
- a curling iron
- a taquine brush
- a regular brush
- 2 elastic bands for hair
- hair lacquer
- Snowflake Bobby Pins (for decoration)
Start with curling the hair (if necessary of course). If your daughter already has curly hair, you can skip this step.
Then you have to tease the hair on top of the crown. Take a teasing brush and any brush back first. Take a hair section of the crown area, hair spray shot to fix the volume to the root and take your teasing brush to make some basic crepage. Just create a better volume, do not go for a truly dramatic "poof". Make the same basic backom on the sides, take hair sections from the left and right sides, and then spray and tease them. This step is actually optional too. If you do not want to tease your daughter's hair, you can jump. Then take the same brush and brush your tease slightly to make it natural and comfortable.
Now you are ready to make an elegant braid. Since Elsa had so many textures at the top, you must enter a section of the top of the top - twist a little and repair it on the crown of the head using an elastic band. Then divide it into three equal sections and start French traitives. From time to time, do not forget to add hair sections from the sides. At first, add a section on the left side, cross it on the center section. Then go to the right section, add a section of right hair and cross it again on the middle. Keep doing exactly the same thing until the end. You can work with very large sections of hair because the braid should seem like a kind of disorder. (Remember that it's the style of Elsa!)
When you arrive at the bottom of the head, add the last section to the left side and finish the braid at the front. While stirring at the front, do not braid on the middle section, but under the median section. Secure the braid down with an elastic band.
Now it's time to styler this braid. At first, come back to your tease and increase the volume a little. Take the bottom of your teasing brush and use it to lift the hair at the roots. Increase the volume just by pulling hair. Then stain the braid from the back, simply pull hair sections from the braid to lose it enough. The braid should look more relaxed. Do the same thing with the braid at the front. Take hair sections, pull slowly and carefully to make this braid braid and more voluminous. Take your time to do it properly, because if you do it quickly, you can end up with a failure. The finishing key consists of decorating the complete braid with the snow bobbyfloir pins.
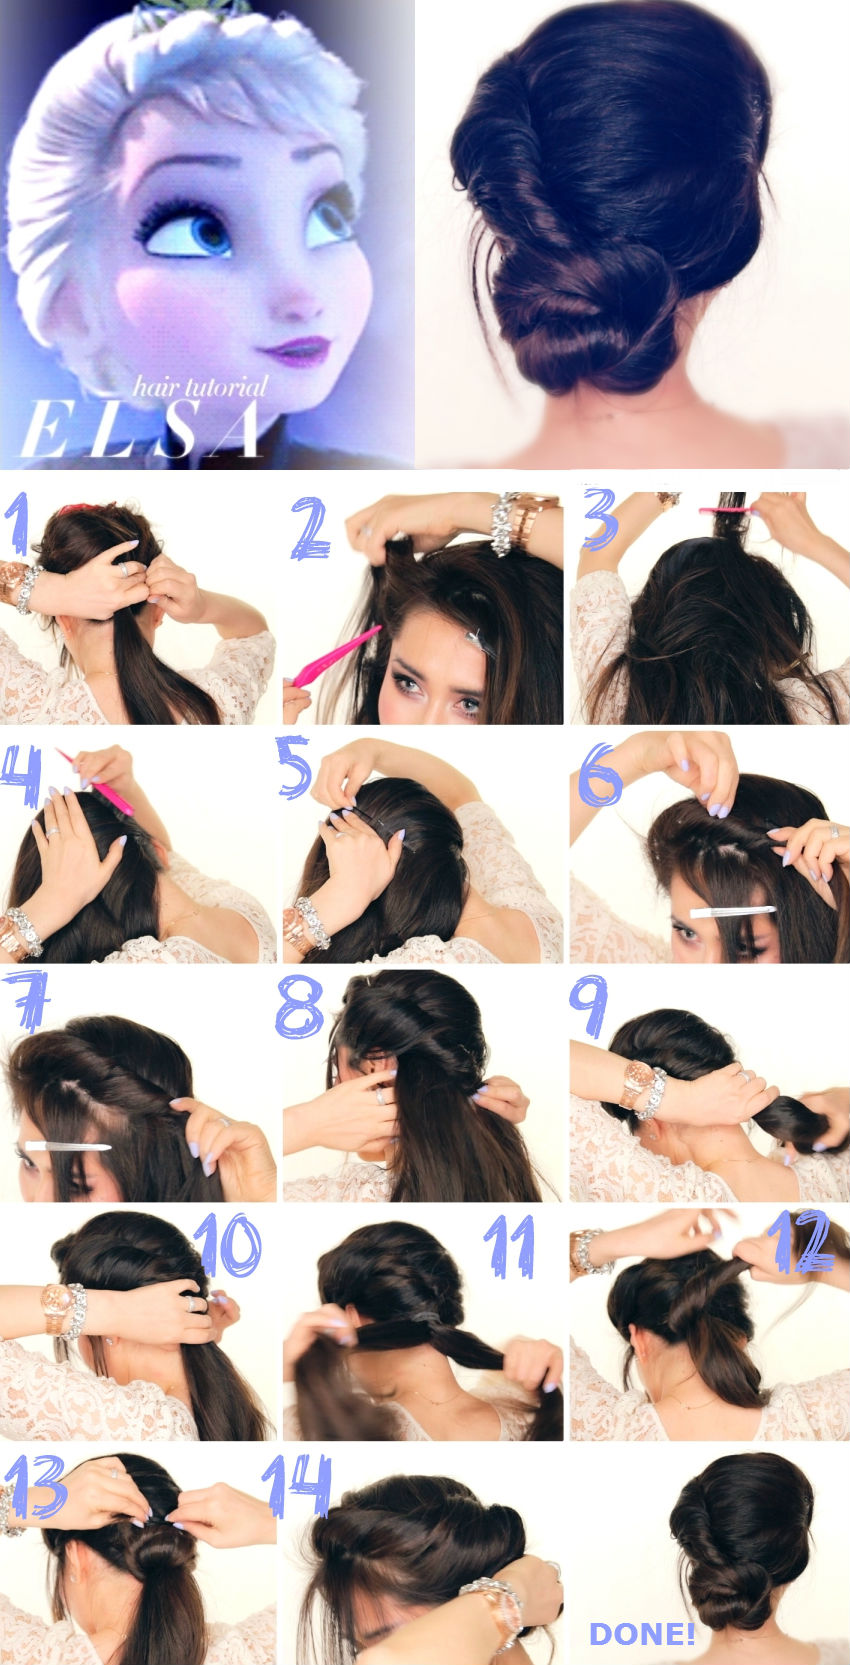
In this quick and easy tutorial, you will discover how to recreate Elsa's coronation hairstyle.
Start by teasing the hair to get a little volume. Take two strands of hair just above your forehead and start twisting your face. Whenever you twist the new strand, you have to add extra hair to the nearest strand. Once you arrive at the back of your head, you have to secure your hair with bobby pins and an elastic band.
Now divide the remaining hair into two parts. Take the right side of the hair and start twisting around itself, then wrap it in the bun - just around this slimmed section of hair around its base. Secure your haircut with pins in Bobby. Do not forget to hide the hair.
Take the other section of the hair and incorporate it into the bread in the same way. Turn it around itself and wrap it around the bread. By using two sections of hair instead of one you will allow you to get a more interesting brioche form. Once again, hide the end of the hair and secure the bread with hairpins. Spray your daughter's hair with a hair spray and the look will be full!

Restaurants slide in this important quality category, guests say
